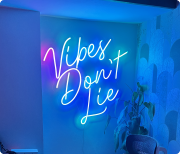
In a world where personal style is limitless and self-expression is paramount, choosing the ideal LED neon light for your space has evolved into a kind of art unto itself. The days of boring, uninspired lighting alternatives are long gone, and we’re jumping headfirst into a neon revolution that promises to turn any space into a captivating haven of creativity and light. The brilliant way to add flare, individuality, and a lot of color to your life is these amazing neon signs and lights by Neon Attack. The ultimate one-stop shop for all of your neon light needs.

LED neon lights vs. Regular neon signs and why led takes the top spot
Although traditional neon signs are recognizable, they are also heavy, costly, and not very environmentally friendly. Conversely, LED neon lights are the best glow-up team. Considering these factors, such as
- Lightweight: You don’t need the assistance of your strongest friend to hang it.
- Energy-Efficient: These gorgeous low-energy-consumption items will save the environment and your pockets, too.
- More secure: Here are safe, cool-to-the-touch LED lights instead of heated glass tubes.
- More Affordably Priced: You may now purchase that custom LED neon light of your dreams without going over budget with Neon Attack.
OK, OK, now enough information. Let’s get to the business and understand the process of installing your LED Neon sign board
Step 1: Gather your squad and basic supplies, such as
- Your awesome LED neon light sign, of course, from Neon Attack, duh!
- Measuring tape
- Pencil to mark those sweet mounting spots
- Mounting hardware screws, hooks, etc. – check your sign’s instructions
- Power adapter to bring your neon masterpiece to life!
Step 2: Find your perfect spot to hang the neon magic
Think about the vibe you want to create. Is it a motivational message above your desk? A custom name light for your gaming room? Once you’ve chosen your spot, use the measuring tape and pencil to mark the mounting holes on the wall.
Step 3: Mount up!
Follow the instructions that came with your LED neon sign. This will usually involve drilling holes in the wall and screwing in the mounting hardware. Don’t worry, it’s easier than it sounds!
Step 4: Plug and play and relax
Connect your LED neon light to the power adapter and plug it in! Watch in awe as your space transforms into a glowing wonderland.
Step 5: Take a pic because it’s Insta-Worthy!
Now that your masterpiece is shining bright, grab your phone and capture the moment. Don’t forget to tag @NeonAttack so they can see your incredible creation!
With these simple steps, you can easily install the dream waterproof LED neon lights in your favorite corner of the house. This will turn your dream into reality and make you an attractive place to be! Forget about those age-old bulbs and glow-in-the-dark stickers that used to be the life of the party!
Custom LED neon signs by Neon Attack have taken over the custom neon sign market by storm, and they continue to do so. Their innovative product named Floro is one such amazing example to lead the way! This innovation can be operated from any smartphone with ease. It offers more than 200 flow mores and 1M+ color options! WOW! Isn’t that just amazing!
So what are you waiting for? Get your cards out and place an order with Neon Attack to turn your neon dreams into reality! Lit up your space and dance away with your crew!
FAQ
Are LED neon signs any good?
Compared with traditional glass neon lights, it is brighter, safer, durable, power saving, no noise, no heat.
Is neon light good for eyes?
Yes, neon lights are typically harmless for your eyes.
Do LED neon signs get hot?
There are many ways we can compare LED neon vs glass neon signs. The first thing to note is that LED neon lights do not get hot at all, as the way they operate is very efficient.
What is the difference between LED neon and glass neon?
an LED sign is the clear choice as it can be up to 10x more energy efficient than the same sign made from glass neon tubes


